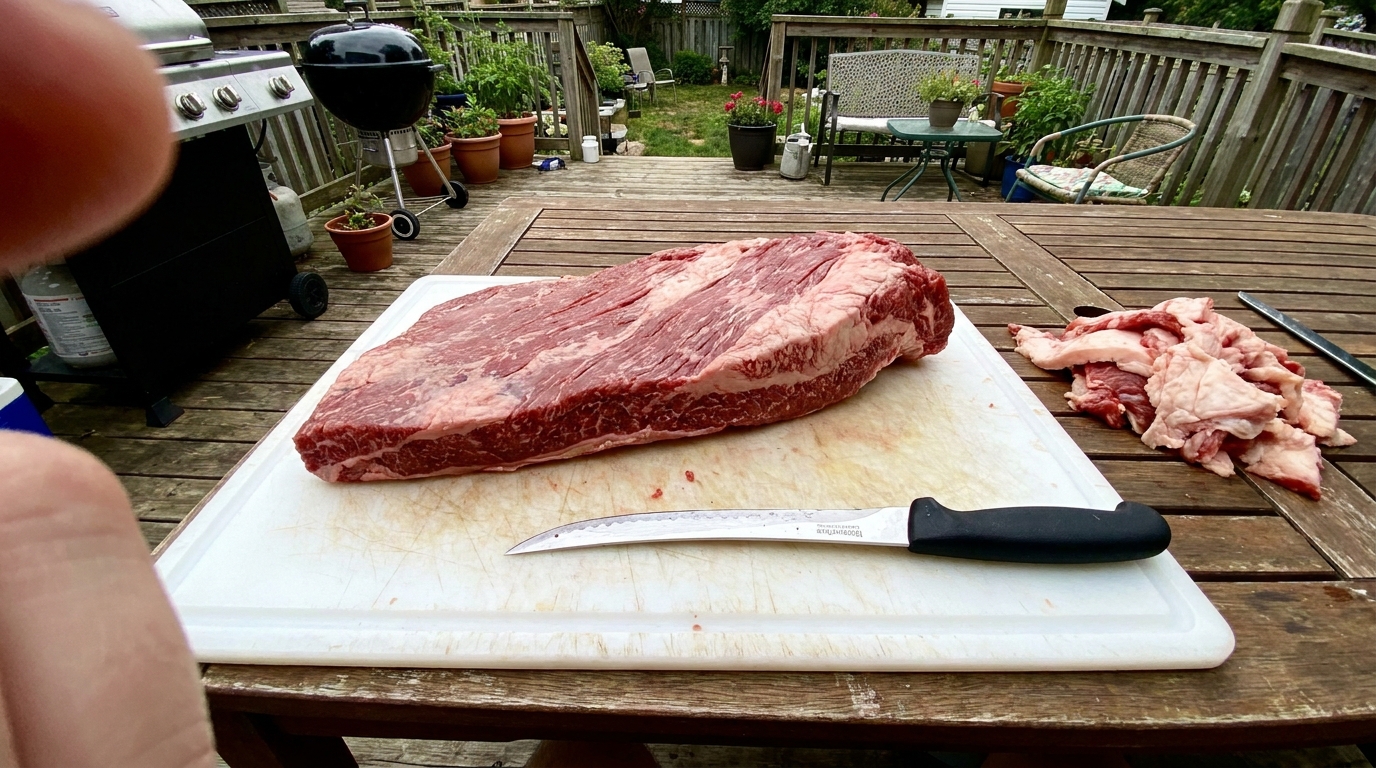
Trimming a Packer Brisket for Even Smoking
Big B’s Quick Hits (TL;DR)
- Aim for aerodynamics: Jagged edges and loose meat flaps will burn. Shape your brisket like a surfboard so heat and smoke glide smoothly across it.
- Keep the meat cold: Fat gets greasy and slippery at room temperature. Put the packer in the freezer for 30 minutes before trimming to make clean cuts.
- Carve out the hard fat: The thick, white seam fat (the deckle) on the side will never render down. Carve it out completely.
- Leave a 1/4-inch fat cap: Do not skin the brisket bald. You need a uniform fat cap to shield the lean flat from the heat source.
Introduction
If you throw a full packer brisket straight from the cryovac onto your cooker, you are setting yourself up for failure. A raw packer is covered in uneven fat, loose thin flaps, and a giant block of hard fat on the side. If you do not trim it, the thin edges will turn to charcoal, the fat will prevent smoke from hitting the meat, and the uneven shape will create turbulent air currents.
BBQ is about airflow. When you run an offset smoker, the heat and smoke should travel over the meat like wind over a sports car. By trimming the brisket into a smooth, rounded shape, you ensure that the smoke rolls cleanly over the surface, creating an even bark without any burnt, dry pockets.
For details on the rest of the cook, see the Smoked Brisket 101 guide.
Why Trimming Matters (Aerodynamics)
To understand why we trim, you have to think of your smoker chamber as a high-heat wind tunnel. In an offset smoker, the hot draft and wood smoke travel in a path from the firebox opening across the cooking grate to the exhaust chimney. Any irregular bump, loose meat flap, or jagged edge on the brisket acts as a roadblock, disrupting this draft and creating turbulent eddies that result in uneven heat distribution and soot buildup.
Another critical factor is thermal mass. The brisket is composed of two distinct muscles: the lean, thin flat and the thick, fatty point. If you leave the flat with thin, tapering corners, those sections will absorb heat much faster than the thick center. Trimming the flat into a neat, rounded shape prevents these extremities from overcooking and drying out, ensuring the whole flat cooks at a consistent rate.
Finally, trimming is essential for building a uniform bark. Smoke particles and dry rub need a smooth, continuous surface to bond with fat and form that classic dark crust. Deep crevices, loose flaps of fat, and shaggy bits of meat trap grease and moisture, resulting in soft, soggy patches of bark that slide right off when you slice the brisket.
Gear: The Right Knife and Cold Meat
Before you slide a blade into an expensive packer brisket, you must choose the right tool. Trying to trim a brisket with a heavy chef’s knife or a serrated bread knife will result in a jagged, hacked-up mess. The industry standard is a 6-inch curved, flexible boning knife, which features a thin, narrow blade that easily slides between fat layers and navigates the natural curved seams of the meat.
Keeping your knife razor-sharp is both a matter of safety and quality. A dull blade requires you to apply excessive pressure, which can cause the knife to slip on the greasy surface of the fat. Use a honing steel to touch up the edge before starting, and make long, smooth pulling strokes rather than sawing back and forth, which leaves rough edges on the meat.
The absolute golden rule of trimming is to work while the brisket is cold. Beef fat is composed of lipids that start to soften and melt at room temperature, turning the packer into a slippery, hard-to-handle surface. Keep the brisket in the coldest part of your refrigerator until the very second you are ready to cut, or toss it in the freezer for 30 minutes to firm up the fat.
Step 1: The Hard Fat and the Deckle
Lay the cold brisket on your cutting board with the fat-cap side facing down. Look at the side of the packer where the thick point muscle meets the flat muscle in a natural curve. In this pocket, you will find a large, dense wedge of solid white fat known as the deckle. This fat is structurally different from the soft fat cap; it is hard, waxy, and will never render down or soften during even a sixteen-hour cook.
To carve out the deckle, hold your boning knife with the blade angled slightly upward, away from the lean flat muscle. Gently slice into the fat pocket, following the natural seam of the meat in a crescent-shaped scooping motion. Work in small, controlled cuts to peel the waxy chunk away, being careful not to gouge deep holes into the meat of the flat.
Once the main deckle wedge is removed, inspect the rest of the brisket edges for similar hard fat deposits. You will often find another solid chunk of waxy fat on the opposite side of the brisket near the web edge of the flat. Shave these hard pockets down until they are flush with the surrounding meat, ensuring there are no dense blocks left to block heat transfer or smoke penetration.
Step 2: Shaving the Fat Cap
Flip the brisket over so the fat-cap side is now facing up. Your goal here is to shave this top fat layer down to a uniform thickness of exactly 1/4 inch (6 mm) across the entire flat muscle. This thickness is the sweet spot for smoking: it is thick enough to shield the lean meat underneath from the dry heat of the cooker, yet thin enough to fully render and integrate with your rub to form a crispy bark.
To achieve this even layer, hold your boning knife flat against the surface, parallel to the meat. Slice in long, steady pulling motions, starting from the point end and moving toward the flat. Watch for high ridges and bumps where the fat naturally piles up, and shave these areas down in thin layers, checking your progress by pressing on the fat with your fingers to feel its depth.
Big B’s Take: Do not skin the brisket bald. Cutting too deep and leaving large patches of bare red meat exposed on the flat will cause those sections to dry out and turn gray during a long cook. If you make a mistake and carve a small bald spot, do not try to even it out by cutting more; just leave it alone. The fat cap is your primary insurance policy, especially when deciding whether to wrap in paper or foil later in the cook, as discussed in foil vs butcher paper.
Step 3: Shaping the Sides and Rounding
With the top and bottom fat layers squared away, focus on the sides of the packer. You will notice that the edges of the flat muscle naturally taper off into thin, shaggy strips of meat and fat. Slice these thin edges straight off until the flat has a uniform thickness of at least 1 inch (2.5 cm). Any meat thinner than this threshold will cook far too fast, drying out and turning into black charcoal long before the center of the cook is reached.
Next, round off all the sharp corners and edges of the brisket to finalize its aerodynamic shape. In a hot smoker draft, sharp corners act like lightning rods, drawing in excess heat and cooking much faster than flat surfaces. Shaving these corners into a smooth, curved “surfboard” profile allows the heat and smoke to glide evenly around the entire packer, preventing dry spots.
Save all the clean beef fat you trimmed off. Put it in a metal pan and place it on the cooker next to your brisket to render into liquid beef tallow. Pouring this smoked tallow over your brisket when wrapping is a classic trick to boost moisture and rich flavor. For full details on the wrapping and resting phases, see the brisket rest and hold guide.
Keep the fire steady and the drinks cold. I’ll see you at the pit. - Big B
Keep the Fire Burning
The Art of Low and Slow: Smoked Brisket 101
Step-by-step brisket selection, trimming, fire temps, wrap timing, and the rest that keeps the flat juicy.
Read GuideHow to Rest and Hold Brisket Without Drying It Out
Pull temps, cooler rests, and overnight holds so your brisket stays juicy from the pit to the cutting board.
Read GuideBurnt Ends at Home from a Packer Brisket
Separate the point, cube it, sauce it, and run a second smoke so you get candy-like burnt ends in the backyard.
Read Guide