The Ultimate Guide to Buckboard Bacon: Why Pork Butt is Your New Secret Weapon
The Ultimate Guide to Buckboard Bacon: Why Pork Butt is Your New Secret Weapon
Hey folks, Big B here.
Most people hear the word “bacon” and they immediately think of the pork belly—that fatty, streaky goodness we all love. But if you’ve been hanging around the pit as long as I have, you know there’s another player in the game that doesn’t get nearly enough credit. I’m talking about Buckboard Bacon.
It’s meatier, it’s cheaper, and once you try it, you might just find yourself skipping the belly aisle at the butcher shop altogether. Buckboard bacon is the thinking man’s breakfast meat. It’s got history, it’s got science, and most importantly, it’s got a flavor profile that’ll make you wonder why we ever started using the belly in the first place. Let’s dive into why this old-school frontier staple belongs in your modern backyard.
2. Anatomy of a Legend: Why the Boston Butt?
Standard American bacon comes from the belly. It’s delicious, but let’s be honest—it’s about 70% fat. Buckboard bacon (also called cottage bacon or shoulder bacon) comes from the upper portion of the hog’s shoulder: the Boston Butt.
 Sectioning the Boston Butt into manageable slabs is the first step toward bacon glory.
Big B’s Take: The shoulder has what we call the “money muscle” (the semispinalis capitis) and deep intramuscular Marbling. That means you get a slice of bacon that eats like a hybrid between a high-end pork chop and traditional belly bacon. You get that salty, smoky punch we crave, but with way more lean protein to hold its shape. It’s also usually half the price per pound of belly. More meat, less money, and better Bark? That’s a win-win in my book.
3. The Frontier Spirit: A Quick History Lesson
The lineage of buckboard bacon is tied directly to the American frontier. In the early 1800s, settlers traveled in buckboard wagons—simple four-wheeled wagons with flexible ash-wood floorboards that “bucked” over rough terrain to provide a primitive suspension.
On the frontier, nothing went to waste. While the belly was often sold off as a commodity, the shoulder was kept for domestic curing. It was salt-cured and kept in those buckboard wagons, providing a durable, high-energy protein source that could survive the long haul across the plains. As for the name “Boston Butt”? In Revolutionary New England, less prestigious cuts of pork were packed into specialized barrels known as “butts” for shipment. The specific butchery style applied in the Boston area eventually standardized the name in the American lexicon.
4. The Science of the Cure: Equilibrium vs. Salt Box
I’m a stickler for the numbers. If you want consistent bacon, you have to move past the “salt box” method where you just bury meat in salt and hope you don’t end up with a salt lick. We use Equilibrium (EQ) Curing.
In an EQ system, the meat reaches a state of stasis. It can’t become “over-salty” because the total amount of salt introduced is precisely what we want in the final product. It’s a biochemical transformation that alters the shelf stability and structural integrity of the meat through Osmosis and dehydration.
The Magic Ratios for a Perfect Cure:
- Total Salt: 2.0% to 2.5% of the total meat weight.
- Prague Powder #1 (Cure #1): 0.25% of the meat weight. This is vital for safety, preventing the germination of Clostridium botulinum spores when we’re smoking in the “danger zone” of 40°F (4°C) to 140°F (60°C).
- Sugar: 1.0% to 2.0% of the meat weight to balance the salinity.
5. Step 1: The Prep (Trimming for Success)
Success starts at the cutting board. Get yourself a nice 8-10 lb (3.6-4.5 kg) Boston Butt. You want to trim off the heavy external Fat Cap. While fat is flavor, we want that cure to penetrate the muscle fibers, not get stalled by a half-inch layer of lard.
Target Thickness: The ideal thickness for a buckboard joint is 3 to 3.5 inches (7.6 to 8.9 cm). If your butt is significantly thicker, butterfly it or section it into slabs. This ensures the cure reaches the center within our timeframe.
6. Step 2: The Mix and the Bag (The EQ Calculation)
Precision is non-negotiable here. Use a digital scale and work in grams.
Calculation Example for a 3,000g Boston Butt:
- Meat Weight: 3,000g
- Salt (2.0%): 60g
- Cure #1 (0.25%): 7.5g
- Sugar (1.5%): 45g
Mix your curing agents thoroughly and rub the mixture into every crevice of the meat. Seal it in a heavy-duty Ziploc or vacuum bag. If you’re doing a wet brine, remember that the water weight must be included in your calculations—treat the water as an extension of the meat’s volume.
7. Step 3: The Long Wait (7-10 Days of “Overhauling”)
This is where the magic happens, and it’s also where most people get impatient. Place that bag in the back of your fridge, keeping it at a steady 34°F (1°C) to 38°F (3°C).
Big B’s Take: You need to “overhaul” the meat daily. This is just a fancy way of saying you need to flip the bag and give the meat a quick massage. This redistributes the natural brine that the salt is pulling out of the muscle. For a 3-inch (7.6 cm) slab, 10 days is the sweet spot. You’ll feel the meat firming up as the proteins denature—that’s exactly what we want.
8. Step 4: Big B’s Flavor Variations
While the basic salt and sugar cure is a classic, the shoulder can handle some serious flavor. Here are my three go-to variations to add to the bag:
- The Bourbon Batch: Add a healthy splash of your favorite bourbon and swap the white sugar for dark brown sugar. It adds an oaky, vanilla sweetness that’s hard to beat.
- The Morning Kick: Add 2 tablespoons of coarsely ground dark roast coffee and a tablespoon of cracked black pepper. The earthiness of the coffee is a perfect match for the pork.
- The Frontier Spice: Add a teaspoon of cayenne pepper and a tablespoon of red pepper flakes. It gives the bacon a “back-of-the-throat” warmth that wakes you up.
9. Step 5: The Rinse and the Critical Pellicle
Once the curing period is up, take the slabs out and rinse them thoroughly under cold water to remove excess surface salt. If you’re worried about salinity, fry up a tiny “test slice.” If it’s too salty, soak the slabs in a cold-water bath for an hour, changing the water every 20 minutes.
After rinsing, pat the meat bone-dry with paper towels and place it on a wire rack in the fridge, uncovered, for 12 to 24 hours. This forms the Pellicle—a tacky, sticky skin.
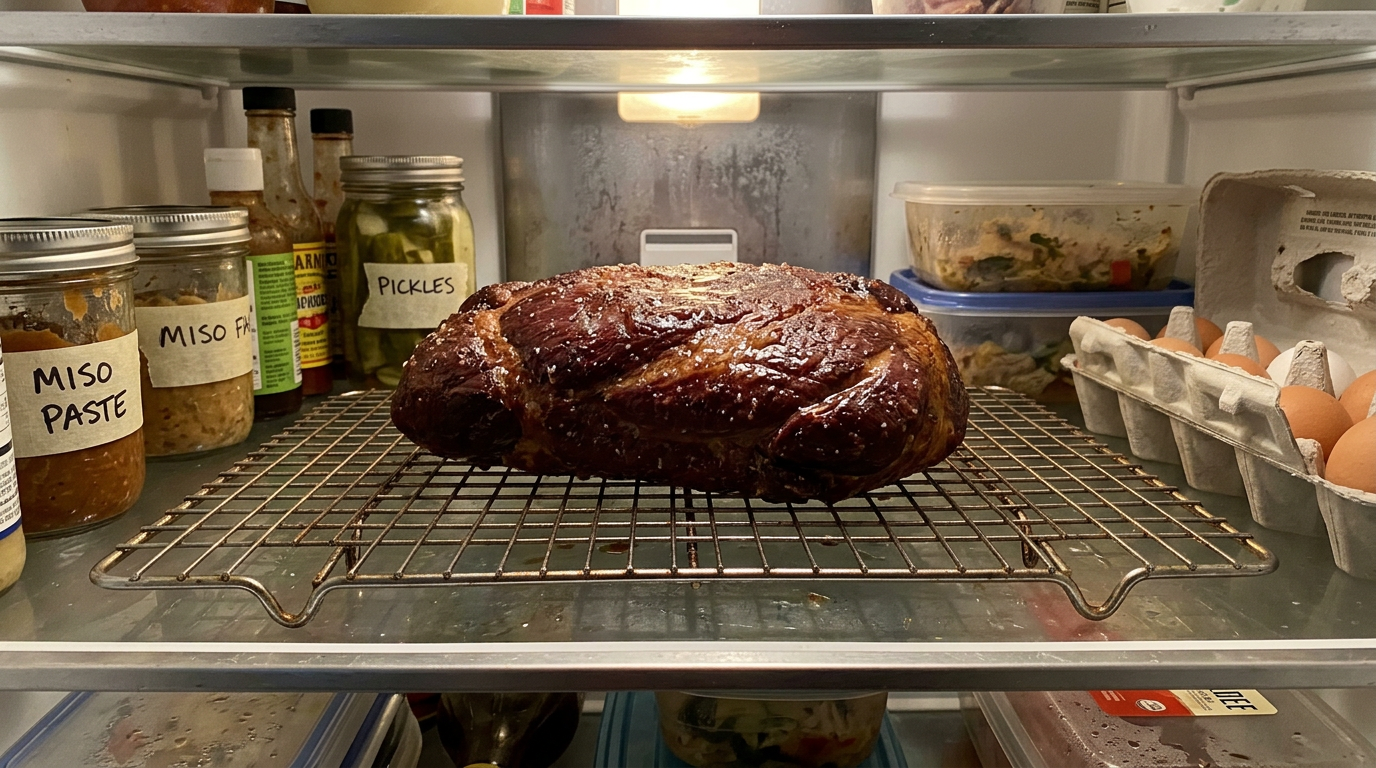 A shiny, tacky pellicle is the secret to professional-grade smoke adherence.
Why it matters: Smoke particulates (phenols) are attracted to a tacky surface. Without a pellicle, your smoke won’t adhere properly, and you’ll miss out on that deep mahogany color and complex flavor we’re after.
10. Step 6: The Smoke (Clean Blue Smoke Only)
This is a controlled thermal application, not a cold smoke. We want to infuse flavor while bringing the meat to a food-safe temperature.
If you’re using an Offset Smoker, remember to keep your fire clean—dirty smoke will ruin ten days of curing in an hour. If you’re on a Pellet Grill, use a smoke tube if you want that extra punch.
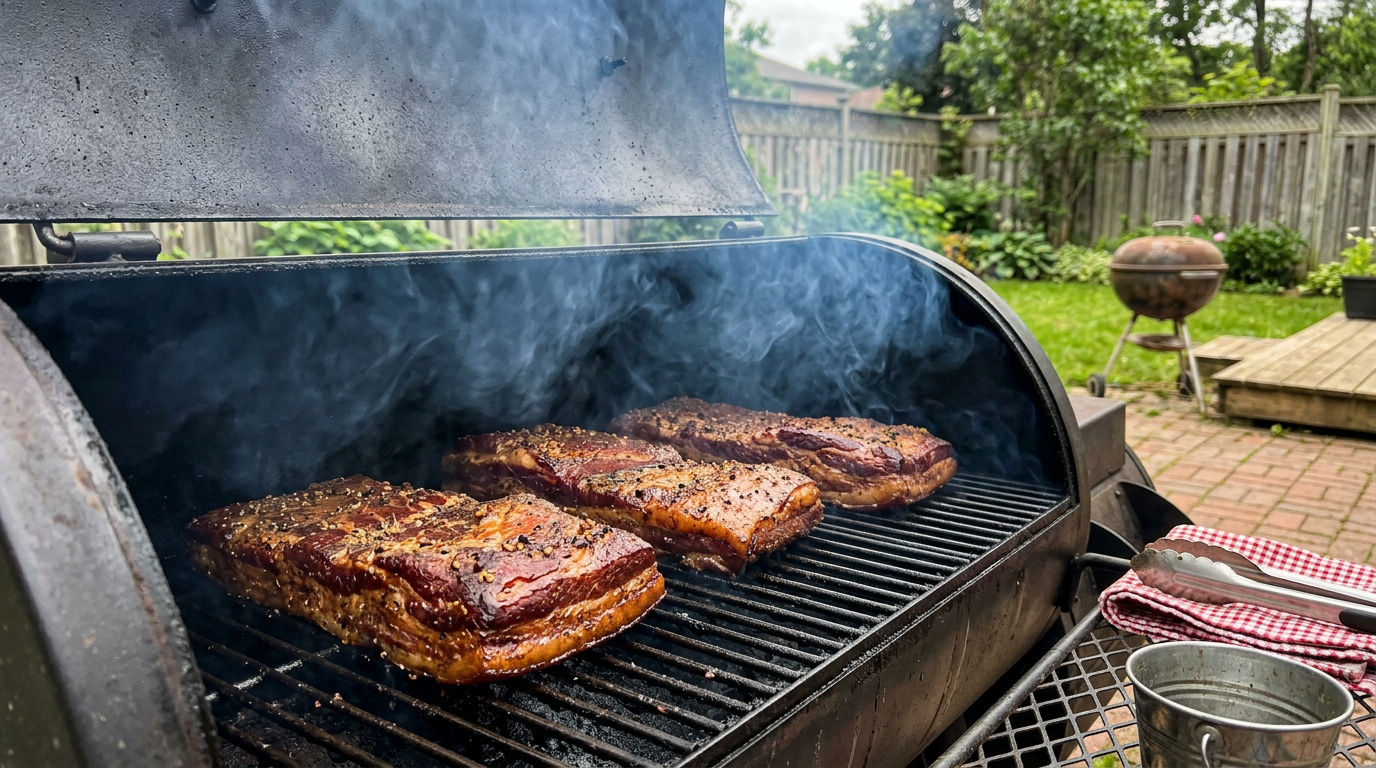 Thin Blue Smoke is the only way to treat a cured shoulder. We’re looking for that low and slow heat.
- Pit Temp: Fire up your smoker to 180°F (82°C) to 200°F (93°C).
- Wood Selection: For buckboard, Applewood or Maple are my top picks. They’re sweet and gentle. If you want that heavy, traditional bacon punch, go with Hickory, but use it sparingly to avoid bitterness.
- Target Internal Temp: We’re looking for 140°F (60°C) to 150°F (66°C). At 140°F, it’s cured and safe to fry. If you push to 150°F, you render more of that shoulder connective tissue, giving it a more “ham-like” texture that you can eat right off the slicer.
11. Step 7: The Finish (Tempering and Slicing)
Don’t you dare slice it while it’s warm. You’ll end up with a shredded mess. Let the slab cool at room temperature for 90 minutes, then refrigerate it overnight.
Big B’s Pro Tip: To get those perfect, “grade-school ruler” strips, you need to temper the meat. Put the slab in the freezer for about 45-60 minutes until it hits roughly 28°F (-2°C). When the fat is semi-frozen, your blade will glide through without tearing the lean tissue. This is the secret to professional-looking bacon.
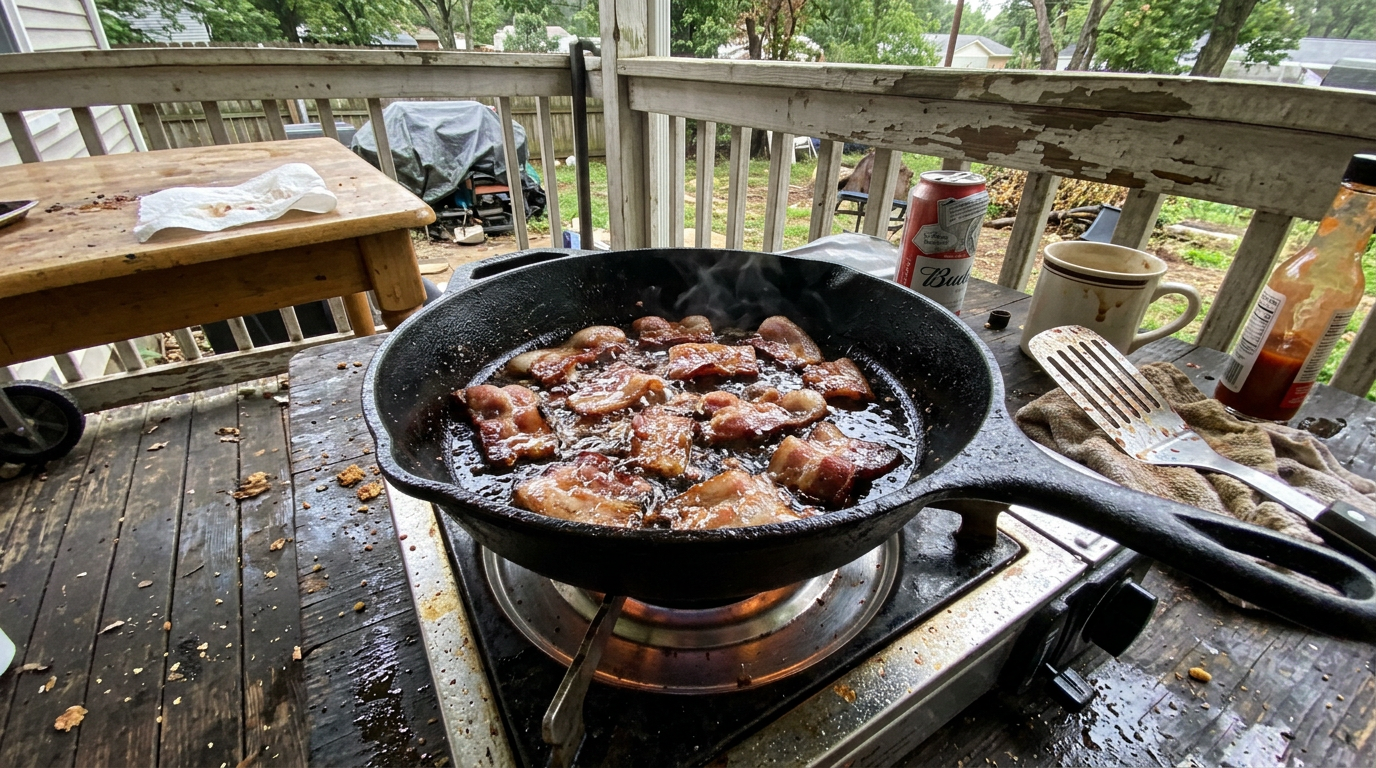
12. Step 8: Strategic Gastronomy (How to Eat It)
Buckboard bacon is a “culinary workhorse.” It has a higher protein-to-fat ratio than belly bacon, so it behaves differently in the kitchen.
 A 1/2-inch thick buckboard bacon steak is the ultimate breakfast luxury.
- The “Bacon Steak”: Slice it 1/4-inch (6 mm) to 1/2-inch (13 mm) thick and sear it in a cast iron. Serve it as a main course with eggs and grits.
- Sandwich Architecture: In a BLT, buckboard bacon stays crispy and doesn’t produce excessive grease, keeping your bread from getting soggy.
- Accordion Freezing: To store it long-term, lay a strip of parchment paper, place a slice, fold the paper over, and repeat. This “accordion” stack lets you peel off exactly what you need from the freezer without thawing the whole batch.
There you have it—the transition from a humble shoulder to the best bacon you’ve ever tasted. It takes time, but like everything worth doing in the backyard, the reward is in the process.
Keep the fire steady and the drinks cold. I’ll see you at the pit.
— Big B